


Are your kids complaining about being bored during summer break? We asked the experts, our kids, to choose and create some summer crafts that will help cure boredom!
DIY Crafts Made by Kids for Kids
1. Clothespin bird
What you will need:
Clothespin
Acrylic Paint
Paint brush
Paper plate
Google eyes
Felt
Feathers
Glue
Scissors
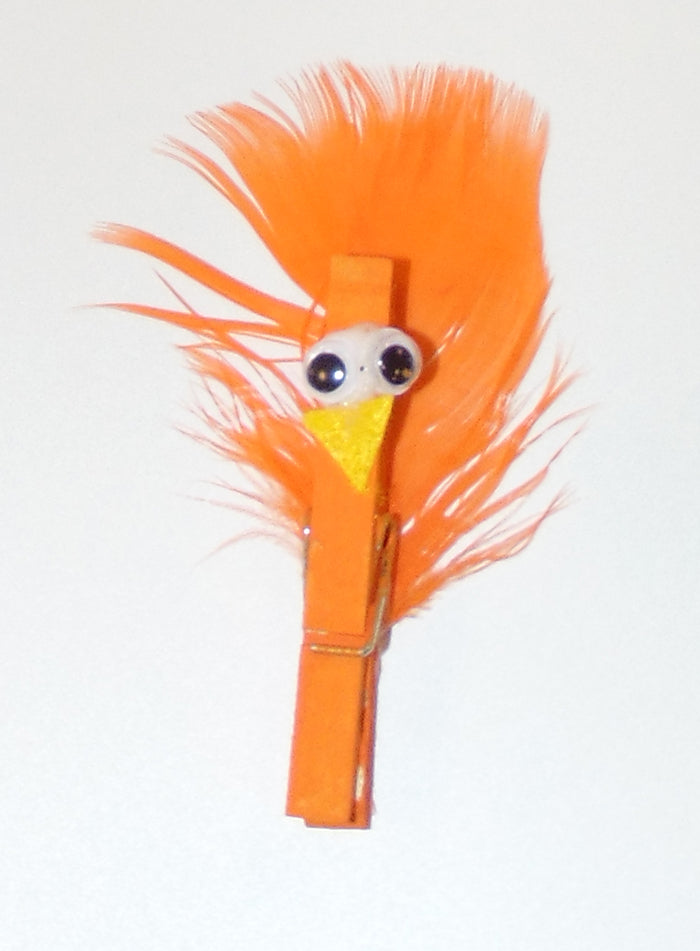
1. Put some acrylic paint on your paper plate.
2. Use your paint brush to paint the clothespin.
3. Let it dry.
4. Cut a small triangle of felt for the beak.
5. When the clothespin is dry, glue the beak, google eyes and feathers onto the clothespin.
2. Paper Lantern
What you will need:
Decorative card stock
Scissors
Tape
Flame-less tea light
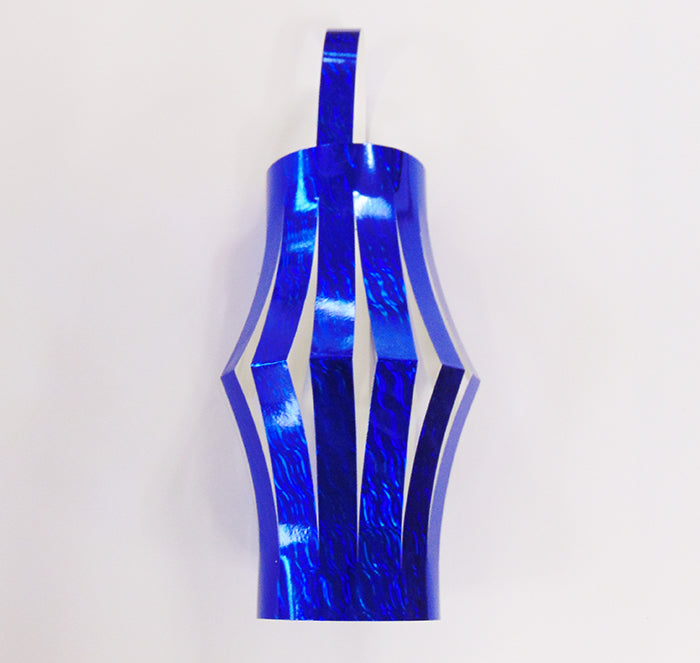
For detailed instructions, visit our friends at Design Dazzle!
3. Popsicle Stick Mermaid and Merman
What you will need:
Popsicle sticks
Glitter
Glue
Felt (we used brown, yellow and green)
Markers
Gem stickers

1. Color your popsicle stick the color that you desire and draw the face.
2. Cut out hair and a tail from your felt pieces.
3. Glue the felt pieces to the back of the popsicle stick.
4. Apply a thin later of glue and carefully sprinkle glitter onto the bottom half of the popsicle stick.
5. Let dry.
6. Apply gem stickers to the popsicle stick.
Make multiple mermaids and mermen and put on a play!
4. Butterfly
What you will need:
Needle and thread
5 Pom poms
Glue
Google eyes
Pipe cleaners
Scissors
1. Thread your needle and make a knot at the bottom.
2. Line your pom poms in a row and then push the needle through all of them; tie a knot at the top of the thread to secure them.
3. Shape your pipe cleaners into loops for the wings and glue them to the back of the butterfly.
4. Glue the google eyes onto the head.
5. Cut a few small pieces of pipe cleaner and attach them to the head as antennae.
5. Lady Bug
What you will need:
Acrylic paint
Paint brush
Glue
Google eyes
Foam sheet
Marker
Clothes pin
Paper plate
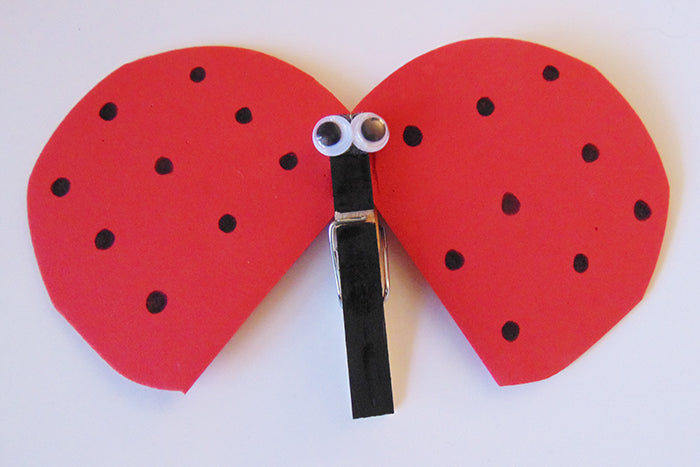
1. Put some acrylic paint onto your paper plate and begin painting your clothes pin with your brush.
2. While the paint is drying, cut out 2 wings from your foam.
3. With your marker, draw the lady bug’s spots onto the foam.
4. When the clothes pin is dry, squeeze it open and place the foam pieces in the opening.
5. Attach the google eyes with some glue.
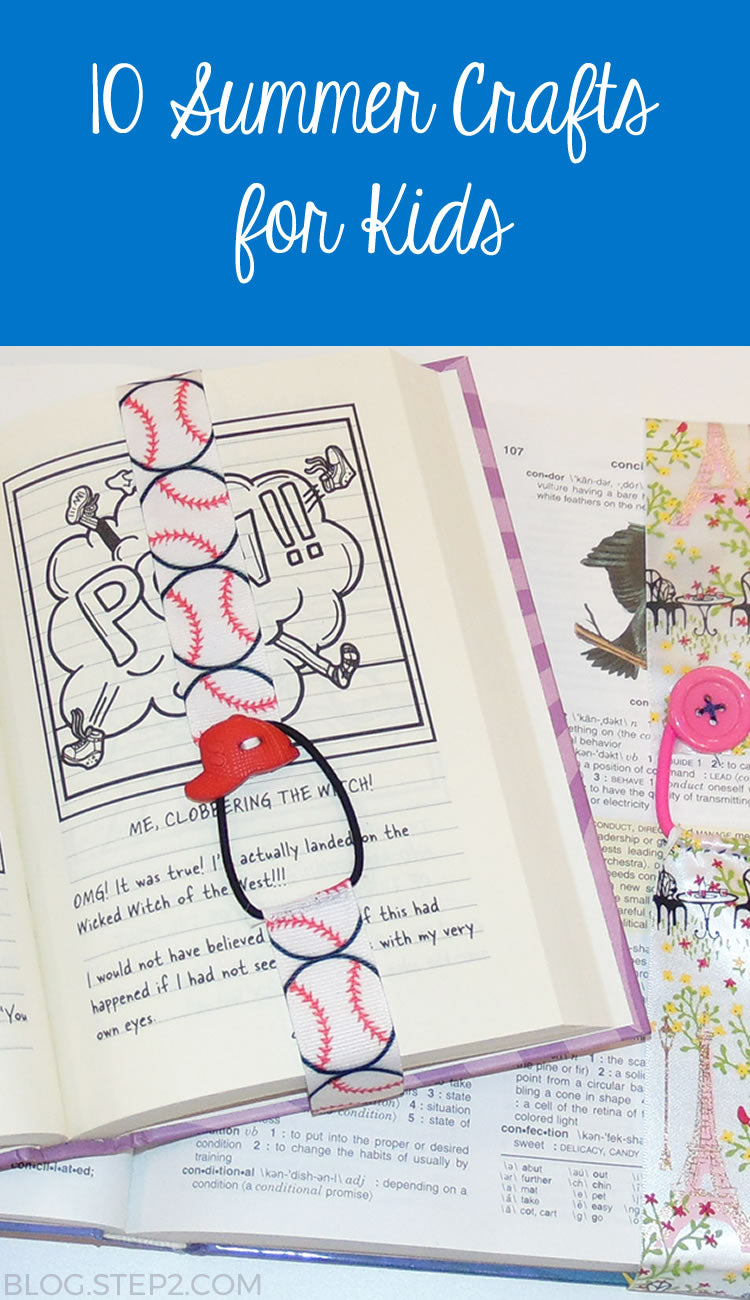
6. Ribbon Bookmarks
What you will need:
Ribbon (at least 1/2″ wide)
Elastic hair band
Button
Scissors
Needle and thread
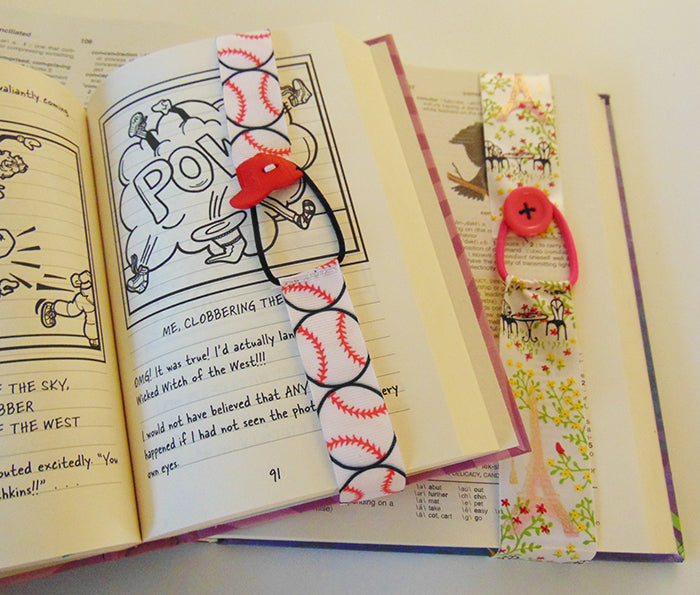
Check out the complete tutorial from Sparkles of Sunshine!
7. Flower pot
What you will need:
Metal flower pot
Tissue paper
Mod Podge
Paint brush
Scissors
Colorful straws
Glue
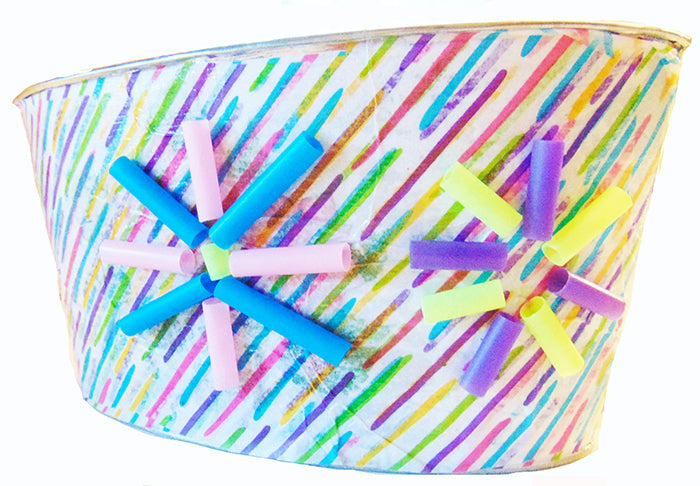
1. Cut the tissue paper to fit around the flower pot.
2. Lay the tissue paper on the pot and apply Mod Podge with your brush and let it dry.
3. Cut your straws into 1″ pieces.
4. When the flower pot is dry, attach the straws with glue. Create your own design to brighten up the pot!
8. Blow Paint Monster
What you will need:
Card stock or canvas
Acrylic paint
Straw
Google eyes
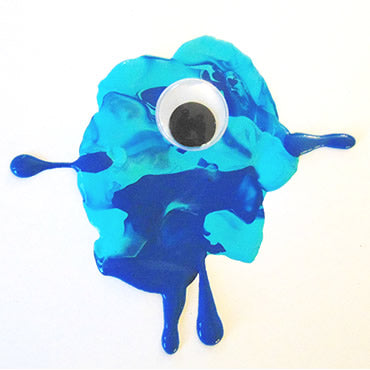
1. Squeeze paint onto the middle of your surface. We squeezed a 1″ diameter spot of dark blue surrounded by smaller light blue spots.
2. With your straw, gently blow the paint around the paper. (Warning, the paint will splatter if you blow too hard!)
3. While the paint is wet, place your google eye or eyes onto the monster.
4. To make the arms and leges, we squirted small lines of dark blue onto the surface.
9. Origami Frog Bookmark
What you will need:
Thick card stock
Google eyes
Felt
Glue
Scissors
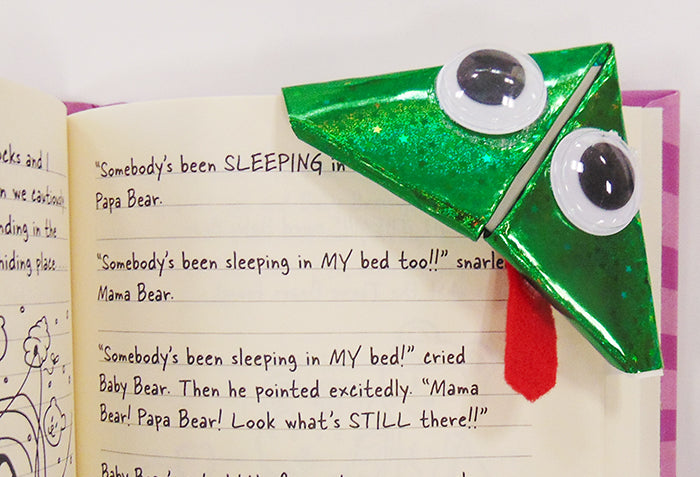
Watch this video tutorial by RED TED Art to learn how to create your bookmark!
10. Bird Feeder
What you will need:
Gallon milk jug
Glue
Paint
Paint brush
Scissors
Miscellaneous crafting supplies
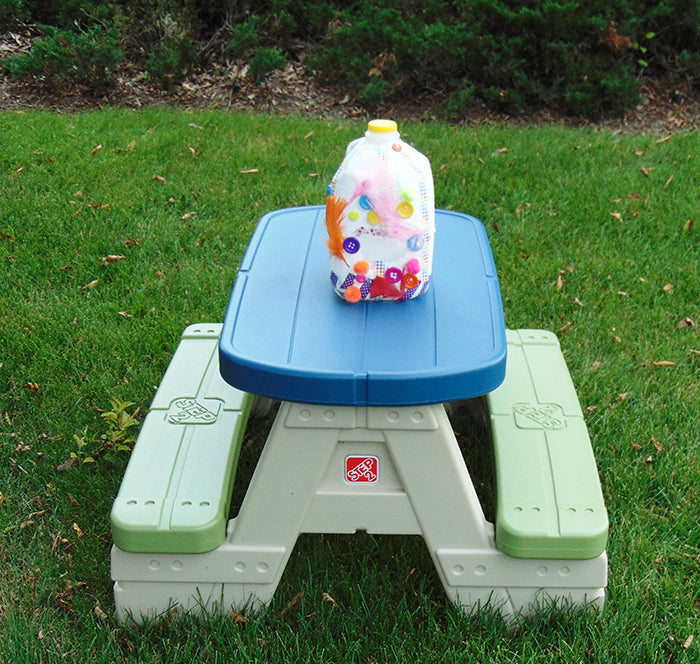
1. Paint your milk jug.
2. After letting it dry, have an adult cut a hole into the side of the jug.
3. Decorate the jug any way you would like!
4. Fill the jug with bird seed and invite the birds over for a picnic!
We hope your kids enjoy making these DIY crafts!